Install ffmpeg
Ffmpeg is available here. There wasn't an auto-installer when I downloaded mine, so you will need to pick a zip folder of the win64 build. Once it's downladed, unzip the folder to an easily accessed folder. I extracted mine to a folder on the C: drive.
Create "RadioShows" folder
Ffmpeg may fail to savethe file instead of automatically generating the folder, so it should be added manually. I set mine up as "C:\RadioShows\".
Create a New Folder for Radio Show Events
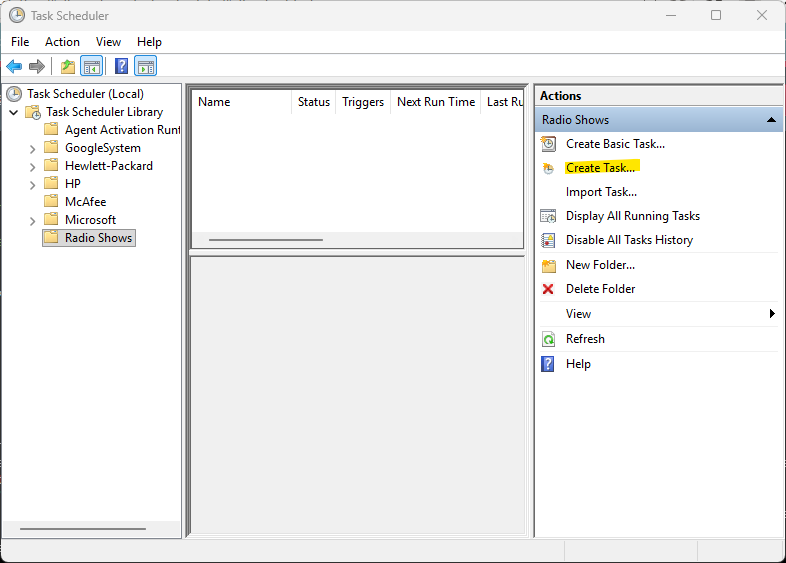
Open the "Task Scheduler" program. The easiest way to find it is to use the Windows search bar. Once it's open, if the "Task Scheduler Library" folder is minimized, double click it or click the arrow to the left of it.

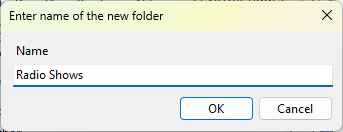
While the "Task Scheduler Library" folder is highlighted, click the "New Folder..." option in the action panel on the right. In the window that pops up, type "Radio Shows."
Once the folder is created, click on it. The middle section should now be blank.
Set Up a Test Stream
With the Radio Shows folder selected, click the "Create Task..." option in the Action panel.
Enter a name for the task. I have called this task "Test. If you want the process to run even if you aren't logged in, then check the box indicating that. This will also prevent a pop-up window from displaying. You may also want to check the box that you don't want to save credentials. If you are testing to see if ffmpeg is installed correctly, you can skip the next step and click the Action tab. Otherwise, click the Trigger tab.

This screen shows when the task will run. Click "Add..." to set the trigger for the task. We most likely want the task to run weekly. Some shows will be daily. Enter the day and the time. Click "OK" and then the Action tab.

The next screen shows the action we want to perform. Click "Add," then make sure "Start a program" is selected. For the Program/script, type cmd.exe. By calling the command prompt instead of the stream recorder directly, we can pull the date variables from the system.
"The Add arguments (optional)" section will include the arguments that determine the input stream, duration of the recording and the output file. This seems like a lot, but most of it can be copied, pasted, and adjusted for each task you want to set up. Lets dissect the following line of arguments:/c "C:\ffmpeg\bin\ffmpeg.exe" -i https://wucx.streamguys1.com/live -t 00:00:30 -c copy C:\RadioShows\MusicYouMayHaveMissed-%DATE:~10,4%-%DATE:~4,2%-%DATE:~7,2%.mp3
- The "/c" flag tells the command prompt that it should close after the stream has been recorded.
- "C:\ffmpeg\bin\ffmpeg.exe" is the path to the stream recorder executable. If you extracted the program to a different folder, then you will need to adjust this line.
- The "-i" flag indicates that the following string will be the input stream. I used the WUCX stream because the URL is shorter than some other ones.
- The "-t" flag indicates the duration of the recording in HH:MM:SS format. We'll record 30 seconds of stream as a test.
- The "-c" flag sets the codec. We are doing a straight copy, so we use the "copy" keyword (since we are doing a copy operation, the file extension at the end of the file path needs to match the encoding of the stream).
- The remainder of the argument line is the path for the output file, using the folder set up in Step 2. The following string
%DATE:~10,4%-%DATE:~4,2%-%DATE:~7,2%simply adds the date in YYYY-MM-DD so files don't get overwritten and the program doesn't prompt for permission to overwrite any previous week's file (which may also prevent the new show from saving if the prompt times out).
Click OK, then click the Conditions tab.

Review the settings on the Conditions tab. These might prevent your stream from recording if you aren't careful. The power section is probably the most important. You have to decide whether you want the computer to still record the stream if it isn't plugged in (in the case of a laptop) and if it's in standby mode. Once you're finished with this tab, click the Settings tab.

On the settings tab, if we are doing a manual test to make sure ffmpeg is working correctly, make sure "Allow task to be run on demand" is checked. This will allow us to run the task directly from the main screen instead of on a schedule. click OK.

Now that the task has been set up, make sure it is selected in the main screen and then click the "Run" action. As long as you have the task set up to only run when the user is logged in (from the General tab), a window should pop up showing the progress of the stream recording. Once the process is complete, the window should close and the audio file should be in the folder designated in the Action of the task.

Set up Stream Recorder Tasks
Once you've verified that everything is working correctly, you can edit the task to record an actual show. Unfortunately, you can't copy and paste tasks, but you can export the task as a template and then import it whenever you want to add a show.